In this guide, we’ll walk you through how to create the configuration for your first connector. We’ll be using a public and free News API as an example.
About News API
The News API is an API that allows users to fetch news articles and top headlines for various news outlets across the globe programmatically. It requires registration, but it is free to use for personal usage, so we’ll use it as an example.
You can register for access here and find the News API documentation here.
Basic info about the News API:
Uses an API key for authentication
Has a couple of different endpoints:
Everything endpoint allowing to search for all the articles with few different filtering parameters
Top headlines endpoint returning top articles based on country or news outlet
Sources endpoint allowing to fetch a list of news outlets they follow
All the endpoints follow simple request structure:
GET request with API key in the header and simple request parameters to narrow down your search
We will be using the Everything endpoint in this tutorial.
Building News API connector
In the beginning, we’re going to build a connector that fetches a list of articles published in Wired for a dynamically defined date range using the Everything endpoint.
The connector will allow users to:
Authenticate with their own API key
Define the date range for which they want to get articles returned for
Request X, Y, Z metrics broken down by A, B, and C.
Let’s get started!
Step 1: Create a new connector
In Connector builder, click Start building to create your first connector.
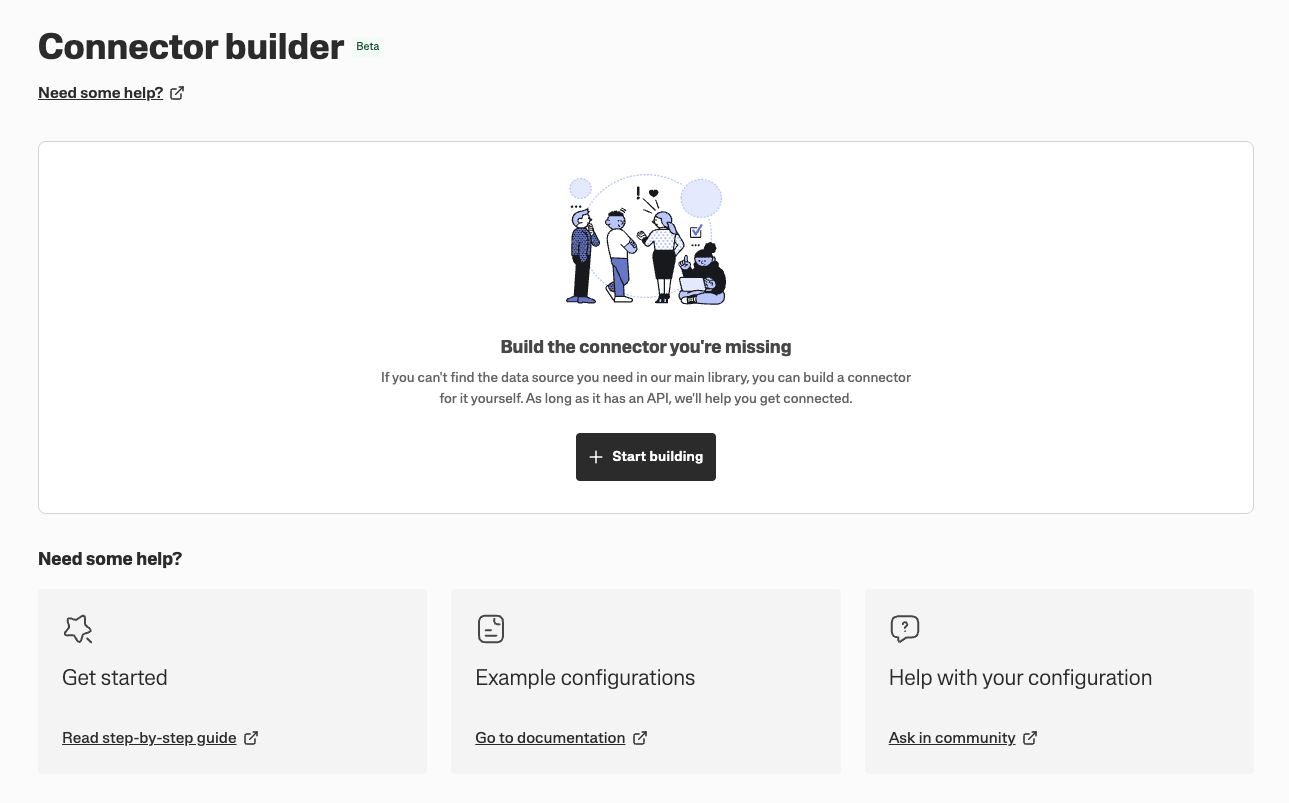
Your connector will have a ready template, but for the sake of this tutorial, let’s start with an empty configuration.
First, we’ll create a base and import the connector configuration schema, which allows you to ensure that the configuration you write is valid:
{
    "$schema": "https://api.supermetrics.com/cc/v1/schema/connector"
}
Step 2: Configure authentication flow
For the users of the connector to be able to authenticate using their own API key, we’ll configure authentication. The API uses an API key as an authentication type, which we’ll want to use in the headers of each request.
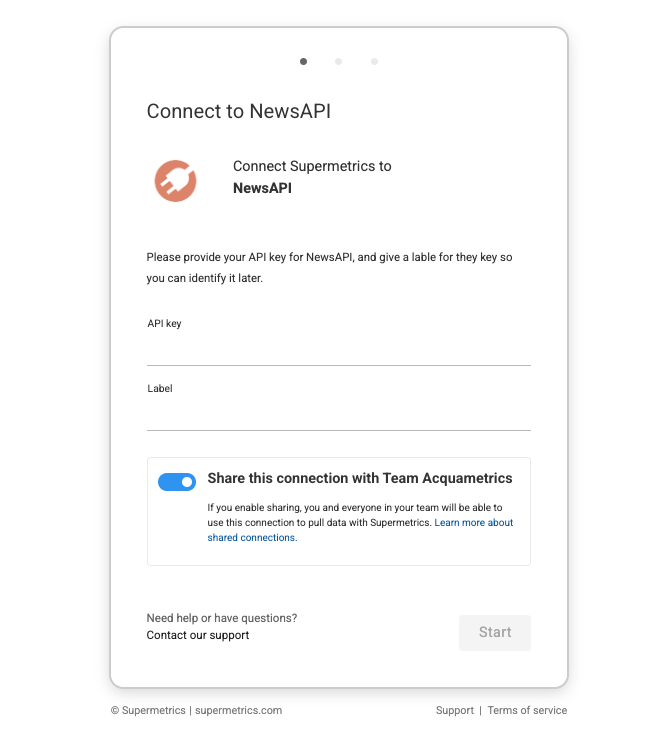
For API key authentication, we’ll use the user_input authentication method, where we ask the user to provide their API key and a label to identify the key later.
{
    "$schema": "https://api.supermetrics.com/cc/v1/schema/connector",
    "authentication": {
        "type": "user_input",
        "description": "Please provide your API key for News API, and give a lable for they key so you can identify it later.",
        "userInputs": [
            {
                "id": "api_key",
                "label": "API key",
                "type": "password"
            },
            {
                "id": "label",
                "label": "Label",
                "type": "text"
            }
        ]
    }
}
Each of the user inputs has:
An
idallowing us to identify the field later in the configurationA
labeldefining how the field is shown for the user in the UIA
typedefining which input type the field has. We use thepasswordtype for the API key here because we don’t want to have secrets visible in the input field.
And this is how it will look for the user of the connector:
Step 3: Configure data source user
After we’ve configured the authentication flow that allows users to enter their API key, we need to store these keys.
To allow multiple users to authenticate to the connector or for a user to use multiple API keys, we want to store these keys in the User object.
In the user object, you can define which information we store about the user (for example, the token, username, or account ID), which we can later use in API requests using placeholders.
"dataSourceUser": {
    "userInfo": {
        "id": {
            "source": "static",
            "value": "{{identity()}}"
        },
        "accessToken": {
            "source": "userInput",
            "value": "api_key"
        },
        "label": {
            "source": "userInput",
            "value": "label"
        }
    }
}
Here we store three pieces of information about the authenticated user:
ID: We want to have a unique ID for each of the authenticated users, and as the API does not provide that, we’ll use
{{ identity() }}placeholder to generate one.Access token: We want to store the user's API key as an access token. The
sourcefor the access token isuserInput, so we’ll read the value from the inputs configured earlier in the authentication flow. And in thevaluewe specify the ID of the field we want to read the key from, in this case, it’sapi_key.Label: Follows the same logic as the access token, but in this case, we use the value from the
labelfield.
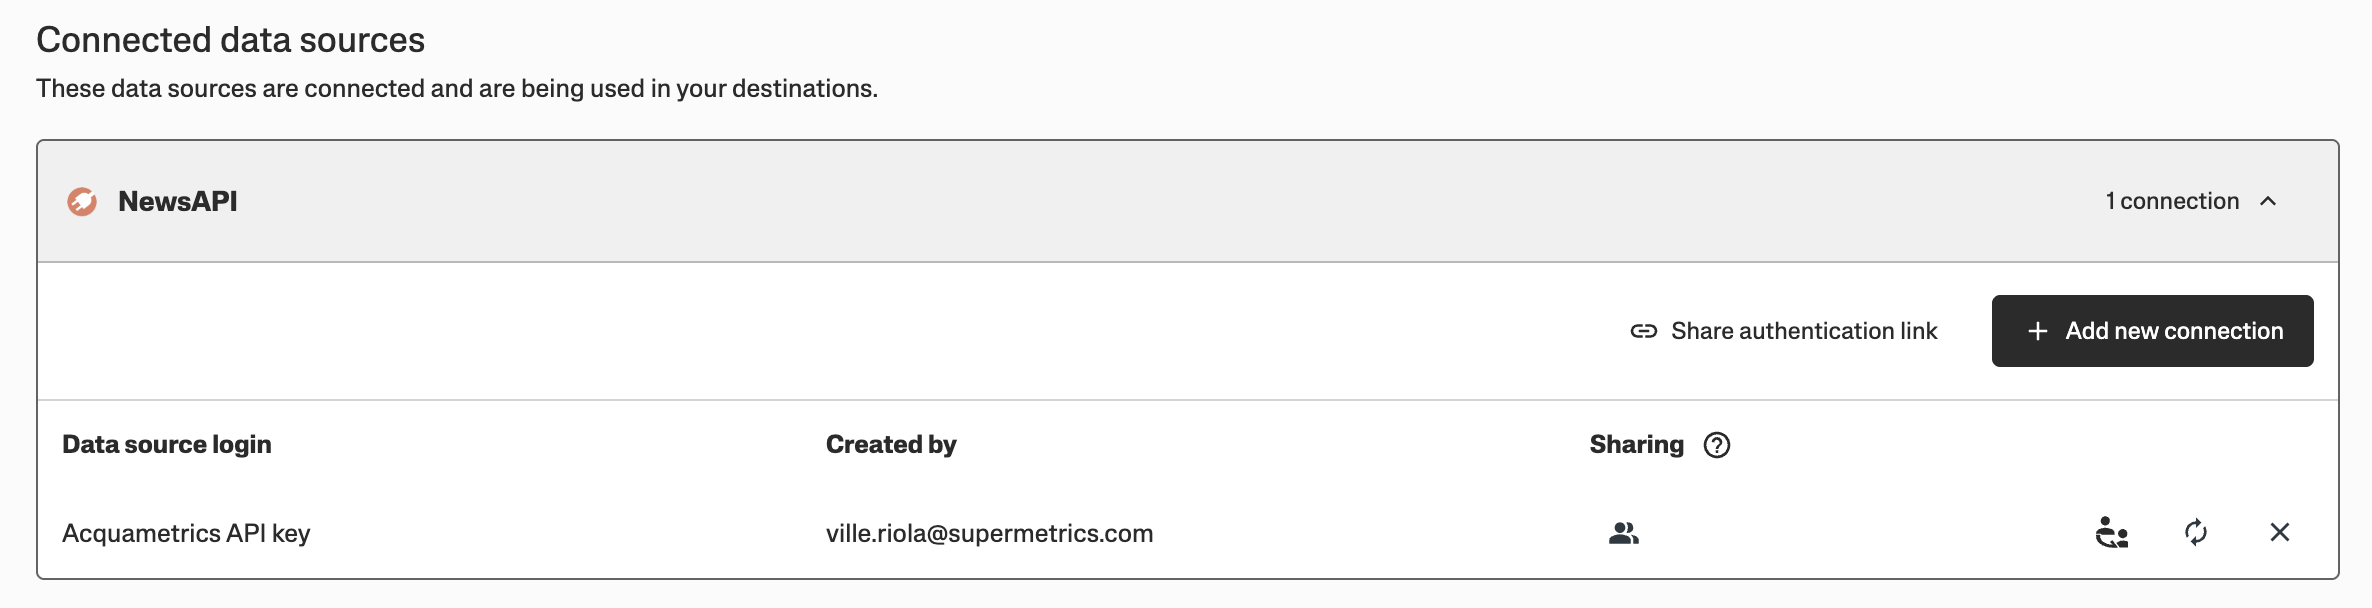
And here is what it looks like for a user after they’ve connected the data source:
The whole configuration should look like this
{
    "$schema": "https://api.supermetrics.com/cc/v1/schema/connector",
    "authentication": {
        "type": "user_input",
        "description": "Please provide your API key for News API, and give a lable for they key so you can identify it later.",
        "userInputs": [
            {
                "id": "api_key",
                "label": "API key",
                "type": "password"
            },
            {
                "id": "label",
                "label": "Label",
                "type": "text"
            }
        ]
    },
    "dataSourceUser": {
        "userInfo": {
            "id": {
                "source": "static",
                "value": "{{identity()}}"
            },
            "accessToken": {
                "source": "userInput",
                "value": "api_key"
            },
            "label": {
                "source": "userInput",
                "value": "label"
            }
        }
    }
}
Step 4: Configure report type
The main element of a connector is its report types. Report types define how data is fetched from the data source API and how it is transformed to reporting-ready data available in Supermetrics. Within the report type, you’ll define multiple key elements of a connector:
>Request: What kind of API request do we make to the data source API to fetch data (URL, method, parameters, headers, and so on)
Response: What kind of response should we expect from the API, how do we read data from the response, and how to paginate
Reporting configuration: General settings related to the report type, such as query options or date range behaviour
Fields: What fields should be available in the connector, to which field each field maps in the API response, what is the data type, how to aggregate, and how to calculate
A connector can support one or more report types, allowing you to retrieve data from all relevant endpoints with a single connector. For more advanced use cases, you can also join data from multiple endpoints using decoration. However, in this tutorial, we’ll stick to simpler approaches.
Step 4.1: Report type fetching data from Everything endpoint
We want to configure a report type that fetches a list of articles published in Wired for a dynamically defined date range using the Everything endpoint.
Let’s first create a base configuration for a report type. We’ll configure a report type, which we call “Articles”, which does the following:
Fetches a list of articles from the Everything endpoint of News API. In the request we:
Make a
GETrequest to the endpointhttps://newsapi.org/v2/everythingUse the API key provided by the user in the request headers
Add
wiredas a static parameter to the request to filter results to get articles only from WiredAllow the user to define a date range for their query, and pass those values via placeholders to the API request
Reads the JSON-formatted response
Provides fields for different values provided by the API in the response
Let’s first create a base configuration for the report type:
"reporting": {
    "reportTypes": [
        {
            "id": "articles",
            "title": "Articles",
            "config": {
                "showDateRange": true
            }
        }
    ]
}
Step 4.2: Configure the API request
Now we have a base for the report type, so let’s next add a request object to define what kind of request we make, and what kind of response we expect.
Configure a GET request to the endpoint https://newsapi.org/v2/everything
"request": {
    "method": "GET",
    "url": "https://newsapi.org/v2/everything"
}
Then, let’s add a headers component where we define the API key provided by the user to be sent as X-Api-Key HTTP header, as well as the static sources parameter to return data only for wired. The dynamic header is applied using placeholders.
"request": {
    "method": "GET",
    "url": "https://newsapi.org/v2/everything",
    "headers": [
        {
            "name": "X-API-key",
            "value": "{{user.access_token}}"
        }
    ],
    "parameters": [
        {
            "name": "sources",
            "value": "wired"
        }
    ]
}
Next, we want to apply dynamic date-range filtering to the connector so that the entire data history isn’t returned. The API allows passing from and to parameters that limit the returned results to the provided dates.
We can allow users to define a date range for their query in the Supermetrics product by adding showDateRange configuration under config object in the report type, and by passing the start and end date user selected for their query using query placeholders.
Configuration for the request object should now look like this:
"request": {
    "method": "GET",
    "url": "https://newsapi.org/v2/everything",
    "headers": [
        {
            "name": "X-API-key",
            "value": "{{user.access_token}}"
        }
    ],
    "parameters": [
        {
            "name": "sources",
            "value": "wired"
        },
        {
            "name": "from",
            "value": "{{query.start_date.date}}"
        },
        {
            "name": "to",
            "value": "{{query.end_date.date}}"
        }
    ]
}
Step 4.3: Configure response handling
And now let’s add a configuration for how the response is read from the API. This is done under response object within the request object.
Looking at the sample API response from the News API Everything endpoint, we can conclude that the response is JSON-formatted, and the relevant data about news articles is provided under articles array.
This means we configure the response handling like this:
typegets valueJSONto explain our system to expect a JSON-formatted responsedataRowsdefines what part of the response contains the relevant data.We define
sourceasjsonPathto explain that we should follow JSONpath to find the correct resultsThen we define
valueto explain what the actual JSONpath is to the results. In this case, it is$.articles.*to target everything within thearticlesarray.
"response": {
    "type": "JSON",
    "dataRows": {
        "source": "jsonPath",
        "value": "$.articles.*"
    }
}
And now we can combine the response with the request object, and put all this into the report type. So the report type configuration should look like this:
 "reporting": {
    "reportTypes": [
        {
            "id": "articles",
            "title": "Articles",
            "config": {
                "showDateRange": true
            },
            "request": {
                "method": "GET",
                "url": "https://newsapi.org/v2/everything",
                "headers": [
                    {
                        "name": "X-API-key",
                        "value": "{{user.access_token}}"
                    }
                ],
                "parameters": [
                    {
                        "name": "sources",
                        "value": "wired"
                    },
                    {
                        "name": "from",
                        "value": "{{query.start_date.date}}"
                    },
                    {
                        "name": "to",
                        "value": "{{query.end_date.date}}"
                    }
                ],
                "response": {
                    "type": "JSON",
                    "dataRows": {
                        "source": "jsonPath",
                        "value": "$.articles.*"
                    }
                }
            }
        }
    ]
}
Step 4.4: Configure fields
Now that we’ve configured successful data fetching, it’s time to configure the fields to the report type.
Let’s first define what data we want to have available in the connector. We start with the following fields:
Author: Who wrote the article, coming from the response field
authorTitle: The title of the article, coming from the response field
titleLink to article: The URL of the article, coming from the response field
urlPublishing date: The date when the article was published, coming from the response field
publishedAt
To configure these to the connector, we’ll need to configure dimensions object, a group array within it, and each field under that group.
For each field, we’ll define:
idfor a unique identifier for the fieldlabelto act as a display namedataTypeexplaining our system in what format the data isdescriptiondescribing the field content to the usersvaluedefining the source for the data, and which field we should look at in the API response
The configuration for the above fields would look like this:
"dimensions": {
    "groups": [
        {
            "label": "ARTICLES",
            "fields": [
                {
                    "id": "author",
                    "label": "Author",
                    "description": "Author of the article",
                    "dataType": "string.text.value",
                    "value": {
                        "source": "jsonPath",
                        "value": "$.author"
                    }
                },
                {
                    "id": "title",
                    "label": "Title",
                    "description": "Title of the article",
                    "dataType": "string.text.value",
                    "value": {
                        "source": "jsonPath",
                        "value": "$.title"
                    }
                },
                {
                    "id": "link_to_article",
                    "label": "Link to article",
                    "description": "A link to the article",
                    "dataType": "string.text.url",
                    "value": {
                        "source": "jsonPath",
                        "value": "$.url"
                    }
                },
                {
                    "id": "publishing_date",
                    "label": "Publishing date",
                    "description": "The date when the article was published",
                    "dataType": "string.time.date",
                    "value": {
                        "source": "jsonPath",
                        "value": "$.publishedAt"
                    }
                }
            ]
        }
    ]
}
And when we combine the fields configuration to the rest of the “Articles” report type, the reporting section configuration will look like this:
 "reporting": {
    "reportTypes": [
        {
            "id": "articles",
            "title": "Articles",
            "config": {
                "showDateRange": true
            },
            "request": {
                "method": "GET",
                "url": "https://newsapi.org/v2/everything",
                "headers": [
                    {
                        "name": "X-API-key",
                        "value": "{{user.access_token}}"
                    }
                ],
                "parameters": [
                    {
                        "name": "sources",
                        "value": "wired"
                    },
                    {
                        "name": "from",
                        "value": "{{query.start_date.date}}"
                    },
                    {
                        "name": "to",
                        "value": "{{query.end_date.date}}"
                    }
                ],
                "response": {
                    "type": "JSON",
                    "dataRows": {
                        "source": "jsonPath",
                        "value": "$.articles.*"
                    }
                }
            },
            "dimensions": {
                "groups": [
                    {
                        "label": "ARTICLES",
                        "fields": [
                            {
                                "id": "author",
                                "label": "Author",
                                "description": "Author of the article",
                                "dataType": "string.text.value",
                                "value": {
                                    "source": "jsonPath",
                                    "value": "$.author"
                                }
                            },
                            {
                                "id": "title",
                                "label": "Title",
                                "description": "Title of the article",
                                "dataType": "string.text.value",
                                "value": {
                                    "source": "jsonPath",
                                    "value": "$.title"
                                }
                            },
                            {
                                "id": "link_to_article",
                                "label": "Link to article",
                                "description": "A link to the article",
                                "dataType": "string.text.url",
                                "value": {
                                    "source": "jsonPath",
                                    "value": "$.url"
                                }
                            },
                            {
                                "id": "publishing_date",
                                "label": "Publishing date",
                                "description": "The date when the article was published",
                                "dataType": "string.time.date",
                                "value": {
                                    "source": "jsonPath",
                                    "value": "$.publishedAt"
                                }
                            }
                        ]
                    }
                ]
            }
        }
    ]
}
Step 5: Combine everything together
After we’ve configured authentication, data source user, and our first report type, let’s combine all these together for a functioning connector.
The complete connector configuration should look like this
{
"$schema": "https://api.supermetrics.com/cc/v1/schema/connector",
"authentication": {
"type": "user_input",
"description": "Please provide your API key for News API, and give a lable for they key so you can identify it later.",
"userInputs": [
{
"id": "api_key",
"label": "API key",
"type": "password"
},
{
"id": "label",
"label": "Label",
"type": "text"
}
]
},
"dataSourceUser": {
"userInfo": {
"id": {
"source": "static",
"value": "{{identity()}}"
},
"accessToken": {
"source": "userInput",
"value": "api_key"
},
"label": {
"source": "userInput",
"value": "label"
}
}
},
"reporting": {
"reportTypes": [
{
"id": "articles",
"title": "Articles",
"config": {
"showDateRange": true
},
"request": {
"method": "GET",
"url": "https://newsapi.org/v2/everything",
"headers": [
{
"name": "X-API-key",
"value": "{{user.access_token}}"
}
],
"parameters": [
{
"name": "sources",
"value": "wired"
},
{
"name": "from",
"value": "{{query.start_date.date}}"
},
{
"name": "to",
"value": "{{query.end_date.date}}"
}
],
"response": {
"type": "JSON",
"dataRows": {
"source": "jsonPath",
"value": "$.articles.*"
}
}
},
"dimensions": {
"groups": [
{
"label": "ARTICLES",
"fields": [
{
"id": "author",
"label": "Author",
"description": "Author of the article",
"dataType": "string.text.value",
"value": {
"source": "jsonPath",
"value": "$.author"
}
},
{
"id": "title",
"label": "Title",
"description": "Title of the article",
"dataType": "string.text.value",
"value": {
"source": "jsonPath",
"value": "$.title"
}
},
{
"id": "link_to_article",
"label": "Link to article",
"description": "A link to the article",
"dataType": "string.text.url",
"value": {
"source": "jsonPath",
"value": "$.url"
}
},
{
"id": "publishing_date",
"label": "Publishing date",
"description": "The date when the article was published",
"dataType": "string.time.date",
"value": {
"source": "jsonPath",
"value": "$.publishedAt"
}
}
]
}
]
}
}
]
}
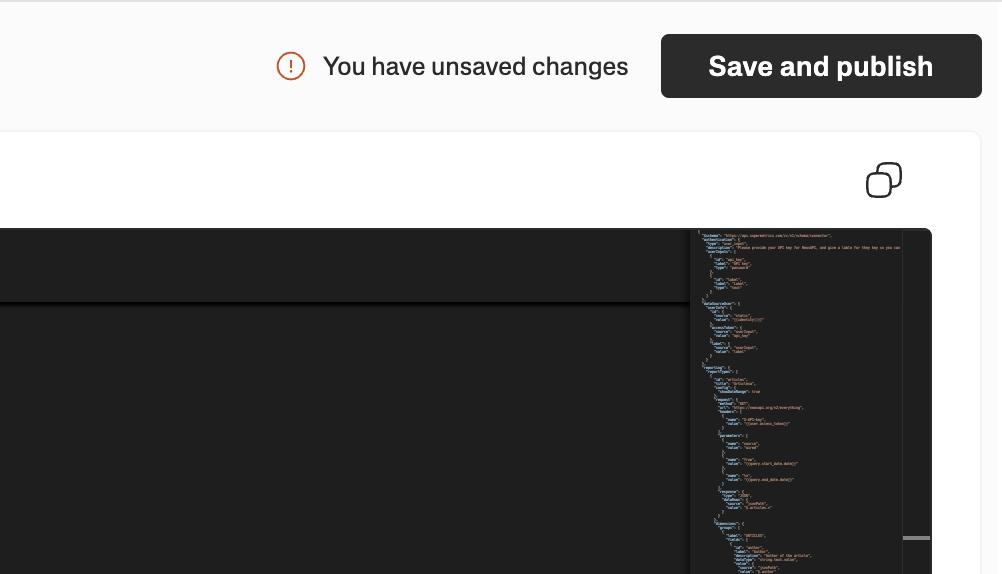
}Step 6: Save your edits
Now the configuration is ready for the first tests! But first, save the configuration by clicking Save and publish on the top right corner. After saving, the new configuration is available as a data source connector in Supermetrics products.
Testing the connector in Data Explorer
Now we’re ready to test the connector. The connector is automatically available in Supermetrics products, and this time we’ll head to Data Explorer to test it out:
On the Supermetrics Hub, go to Data Explorer.
Under the data source selection, select your newly created data source connector.
Create a new connection.
Authenticate using your News API API key.
Now you can configure a query:
Select the date range for which you want to get articles for.
Select the fields, like Title, Publishing date, and Author.
Click Load data.
You should see the data fetched from the News API populated on the page.